Showing posts with label craft. Show all posts

Thursday, March 3, 2016

Make Your Easter Bunny From Fabric

Handmade Easter bunny


Stuff it with wool to make a toy, or fill with dried lavender to scent a room
- a great way of recycling old jumpers.

rag doll


YOU WILL NEED

To make your own Easter cloth fabric bunny:

paper bunny pattern - download from internet
paper, pen, pins and sewing scissors
old wool blanket or jumper
tailors’ chalk or water-soluble fabric pen
sewing machine and cotton thread
wooden spoon
sheep’s wool or dried lavender and millet
needle, embroidery needle and thread
ribbon for a bow
orange felt and green ribbon for carrot
coloured felt or wool fabric for clothes

How to Make Easter Bunny Cloth Rag Doll

1 Cut out the template and draw around it with chalk onto the wrong side of the wool - this is your sewing line. Leaving an extra 2cm around the edge, cut out the shape Draw around this onto the wrong side of more wool to make the back of the bunny.

2 Place your two wool pieces right sides together and pin. Start at the right shoulder and machine-sew around the chalk line using a small straight stitch until you reach the base of its right ear. Over-sew the first and last couple of stitches for added strength.

3 Remove your pins and turn the bunny the right way out. using the handle of a wooden spoon to push out the ears, arms and legs.

rag doll


4 Stuff your shape - using the spoon handle to poke the filling in. Hand-sew the opening closed. Define the arms by stitching through the body, from shoulder to underarm.

5 For the face, push an embroidery needle and thread through the back of the head and add two eyes, a mouth and nose. Secure the thread with a couple of stitches, then push the needle out through the back of the head. Cut off the loose ends.

6 For the carrot, cut a triangle of orange felt. Place strips of green ribbon along the short edge and sew them in place. Roll up the triangle to form a cone, with the ribbon at the top. then hand-stitch along its length.

7 For the jacket, create a template using the bunny pattern: draw a line across the neck, waist and wrists. Cut this out. then draw round it onto your fabric. Cut this shape out and repeat so you have the front and back of a jacket. Snip a V out of the neck on the front piece, then hand-sew the jacket onto
the bunny round the seams and under the arms, joining the materials as you sew down the arms. Hand-stitch the paws together.


My  handmade Easter Bunnies


You can purchase them from my etsy store.

Rag Tilda Waldorf Decorative Collectible Bunny

bunny art doll in pink
https://www.etsy.com/listing/269845126/rag-doll-bunny-waldorf-rabbit-bunny-in

https://www.etsy.com/listing/267785446/stuffed-rabbit-bunny-waldorf-doll-easter

                   https://www.etsy.com/listing/269849098/rag-bunny-waldorf-rabbit-bunny-doll-in

Vintage Toy Rag doll Tilda couple in love. Toy animals. Stuffed animal rabbit doll. Valentine, Shabby chic

https://www.etsy.com/listing/265990491/waldorf-doll-rabbit-bunny-vintage-toy


Sunday, March 10, 2013

Polymer clay tutorial

Polymer clay tutorial

Here is a picture polymer clay tutorial on how to make lilies of the valley glass candlestick.

Polymer clay
For this polymer clay project you will need:


Polymer clay tutorial


Polymer clay tutorial

Polymer clay

Polymer clay tutorial

Polymer clay tutorial

Polymer clay tutorial

Polymer clay tutorial

Polymer clay tutorial


Very nice spring craft project made from polymer clay. 

Tuesday, March 5, 2013

Make a paper flower snowdrops

Crape paper flower snowdrops

Here is tutorial on make a paper flower snowdrops from the crape paper.

make a paper flower, crape paper flower, craft

make a paper flower, crape paper flower, craft


Make a paper flower 

To make a paper flower  take a strip of white crepe paper with width of 35 mm. 
Crape paper for the children's art is subtle, so it is necessary to join two sheets of crape paper to make the paper flower snowdrops. Gently spread the pencil glue in the transverse direction on the strip of crape paper  and cover with the second layer of paper. Pretty soon, the paper is dry.

make a paper flower, crape paper flower, craft

Fold it  in three layers and cut  in the shape of the petals in the form of an elongated drop.

make a paper flower, crape paper flower, craft


To make a paper flower from the crape paper  it's best to use a special floral wire. Or you can buy a special Japanese floral wire already wrapped in green paper. But if you can not find such a wire, you can wrap the wire yourself. Just cut the roll of olive color crape paper width of 3-5 mm. Dip the tip of the paper to the glue and start winding the wire. Glue tthe end of the tape.

make a paper flower, crape paper flower, craft

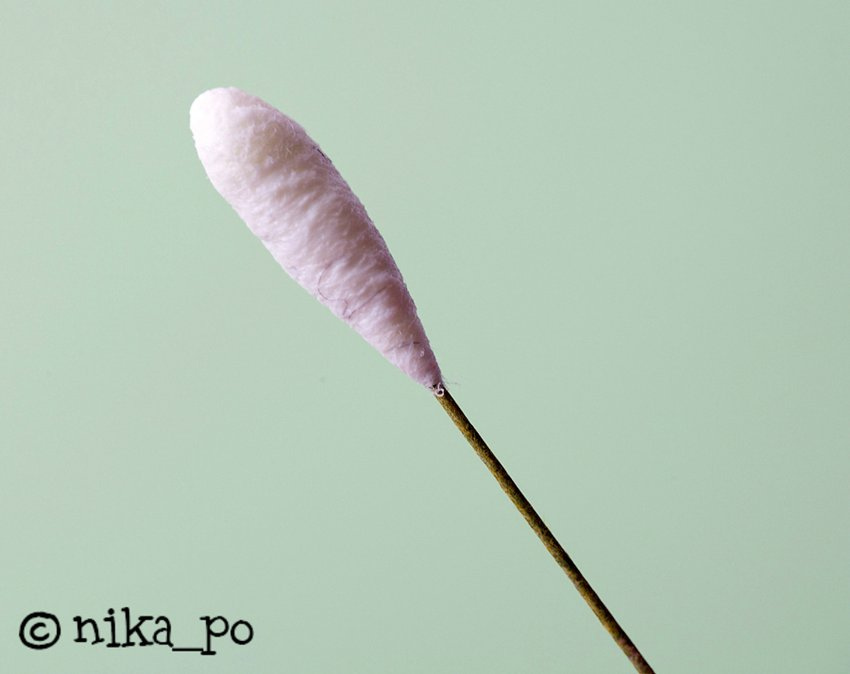
Now, next step to make a paper flower is to take a piece of wire 12 cm long, dip the tip in the glue and wrap around it a piece of cotton, as shown on the picture.

make a paper flower, crape paper flower, craft

make a paper flower, crape paper flower, craft

make a paper flower, crape paper flower, craft

Now spread the glue on the top. You can also dip it into the grits colored in yellow (using watercolors).

make a paper flower, crape paper flower, craft

Now it's time to make the inner petals of our snowdrops paper flower. Take a strip of white crape paper 25 mm wide, cut one edge as shown on the pic and touch up with light green watercolor. In order the color was perfectly suited to the leaves color, I embellish it with crape paper from which made the leaves and wrap the stems. Crape paper molt very much, so put a piece of green crape paper on the white paper and drop in it drops of water and white glue. After a while you'll get a greenish liquid glue. I'm using a cotton swab to color inner petals.

make a paper flower, crape paper flower, craft


Wrap the strip around the wire. Gently help with the fingers to stretch the paper flower petals in the middle, giving them a convex shape.

make a paper flower, crape paper flower, craft

Lubricate the middle of a paper flower with the glue and glue the petals. When the glue dries, wrap a strip of green crape paper around the wire.

make a paper flower, crape paper flower, craft

Take a strip of olive crape paper 50 by 25 mm. Wrap the edges and twist the tip of one. Cut the most twisted. This is an upper leaf, stick it just below the flower.

make a paper flower, crape paper flower, craft

make a paper flower, crape paper flower, craft

Cut the leaves from a double-cut olive crape paper and affix it to the paper flower stem.

make a paper flower, crape paper flower, craft

make a paper flower, crape paper flower, craft

Source: http://master-klass.livejournal.com/565882.html
-->

Monday, March 4, 2013

Crochet Craft. Spring Hat Crochet Free Pattern

Petite Spring Hat Crochet Free Pattern

Design by Patricia Ritchie

Beautiful crochet craft idea for a spring project. This petite crochet spring hat with free pattern will decorate and brighten your room!

Crochet Craft. Spring Hat Crochet Free Pattern


CROCHET CRAFT. FINISHED MEASUREMENTS FOR THE PETITE CROCHET HAT
21/2 inches in diameter (Bottom) x 21/4 inches high

CROCHET CRAFT MATERIALS

• Aunt Lydia’s Classic Crochet size 10 crochet cotton (white: 400 yds per ball; solids: 350 yds per ball;
shaded colors: 300 yds per ball):
50 yds each #1 white and
#15 shaded pinks
15 yds #397 wasabi
• Sizes 9/1.25mm and 7/1.65mm steel crochet hooks or size needed to obtain gauge
• Tapestry needle
• Stitch marker
• Small amount fiberfill
• Straight pin with white head
• 60-inch retractable tape measure 2 inches in diameter x 1/2 inch high
GAUGE
Size 7 hook: 8 sc = 1 inch;
9 sc rows = 1 inch


CROCHET CRAFT PATTERN NOTES

Weave in loose ends as work progresses.
Join with slip stitch as indicated unless otherwise stated.
Chain-3 at beginning of round counts as first double crochet unless otherwise stated.
Chain-4 at beginning of round counts as first treble crochet unless otherwise stated.

CROCHET CRAFT HAT

BOTTOM
Rnd 1: With size 7 hook and shaded pinks, ch 2, 6 sc in 2nd ch from hook, join (see Pattern Notes) in first sc. (6 sc)
Rnd 2: Ch 1, 2 sc in each sc around, join in first sc. (12 sc)
Rnd 3: Ch 1, 2 sc in same sc as beg ch-1, sc in next sc, [2 sc in next sc, sc in next sc] around, join in first sc. (18 sc)
Rnd 4: Ch 1, 2 sc in same sc as beg ch-1, sc in each of next 2 sc, [2 sc in next sc, sc in each of next 2 sc] around, join in first sc. (24 sc)
Rnd 5: Ch 1, 2 sc in same sc as beg ch-1, sc in each of next 3 sc, [2 sc in next sc, sc in each of next 3 sc] around, join in first sc. (30 sc)
Rnd 6: Ch 1, 2 sc in same sc as beg ch-1, sc in each of next 4 sc, [2 sc in next sc, sc in each of next 4 sc] around, join in first sc. (36 sc)
Rnd 7: Ch 1, 2 sc in same sc as beg ch-1, sc in each of next 5 sc, [2 sc in next sc, sc in each of next 5 sc] around, join in first sc. (42 sc)
Rnd 8: Ch 1, 2 sc in same sc as beg ch-1, sc in each of next 6 sc, [2 sc in next sc, sc in each of next 6 sc] around, join in first sc. (48 sc)

Rnd 9: Ch 1, sc in each sc around, join in first sc.
Rnd 10: Working in back lp (see Stitch Guide) of each st, ch 4 (see Pattern Notes), tr in each of next 45 sts, leaving last 2 sts unworked, leaving 18-inch length, fasten off. (46 tr)

TOP
Rnds 1–8: Rep rnds 1–8 of Bottom. (48 sc)
Insert tape measure in Bottom with retraction button at center bottom of crocheted piece and tab of the tape measure in the opening of 2 rem sts of rnd 10. Position Top on Bottom and sew tog, leaving the 2 sc sts of Top unsewn.

PINCUSHION CROCHET HAT

Rnds 1–7: With size 7 hook and white, rep rnds 1–7 of Bottom. (42 sc)
Rnd 8: Place st marker in first sc of rnd 8 and move as rnds progress, ch 1, sc in each sc around, do not join rnd. (42 sc)
Rnds 9–17: Sc in each sc around, do not join.

Rnd 18: 2 sc in each sc around. (84 sc)
Rnds 19–24: Sc in each sc around.
Rnd 25: Ch 1, [working backward (right to left if right-handed, opposite if left-handed), sl st in previous sc, ch 1] around, join in first st. Fasten off.

Joining Hat

Thread 18-inch length of white on tapestry needle, sew rnd 17 of Pincushion Hat to rnd 8 of Top, stuffing Hat with fiberfill before closing.

HATBAND

Row 1: With size 9 hook and wasabi, ch 55, sc in 2nd ch from hook, sc in each rem ch across, turn. (54 sc)
Row 2: Ch 1, sc in each of next 7 sc, 5 dc in next sc, sk 1 sc, [sc in next sc, sk next sc, 5 dc in next sc, sk next sc] across to last 7 sc, sc in each of next 7 sc, turn. (10 groups 5 dc)
Rnd 3: Now working in rnds, ch 1, sc in each sc and in each dc st across, ending with 2 sc in last sc, working on opposite side of foundation ch, 2 sc in first ch, sc in each rem ch across to last ch, 2 sc in last ch, sc in same st as first sc of rnd 3, leaving 12-inchlength of cotton, fasten off.

Place Hatband around base of Hat crown, cross ends at back and sew in place.

CROCHET FLOWER

Rnd 1: Leaving a 12-inch length at beg, with size 9 hook and shaded pinks, ch 6, join in first ch to form a ring, ch 1, 12 sc in ring, join in first sc. (12 sc)
Rnd 2: Ch 3 (see Pattern Notes), 5 dc in same sc, 6 dc in each of next 11 sc, join in 3rd ch of beg ch-3. Fasten off. (72 dc)

Sew Flower to center front of Hatband. Insert straight pin through center of Flower.


Saturday, March 2, 2013

Crochet purse

Crochet patterns for purses and bags

Flower Garden Crochet Purse

This crochet patterns for purse design by Frances Hughes.

crochet patterns for purses and bags


CROCHET PURSE FINISHED SIZE

7x7 inches x 3 inches deep

MATERIALS FOR CROCHET FLOWER GARDEN PURSE

• Patons Canadiana medium (worsted) weight yarn (31/2 oz/228 yds/lOOg per skein):1 skein each #10708
really green and #00029 light blue
• Medium (worsted) weight yarn: 3 yds each purple, red, orange, bright pink, blue and bright yellow
• Size G/6/4mm crochet hook or size needed to obtain gauge
• Tapestry needle
• 18 clear pony beads
• Stitch marker

GAUGE

4 sc = 1 inch; 4 sc rnds = 1 inch

CROCHET FLOWER PURSE PATTERN NOTES

Weave in loose ends as work progresses.
Join rounds with a slip stitch unless otherwise stated.
Use 3-yds lengths of yarn for Large and Small Flowers.

LARGE CROCHET FLOWER

Make 9.
Rnd It With Flower color,ch 4, sl st in first ch to form a ring,ch 3 (counts as first dc), 13 dc in ring,
join in 3rd ch of beg eh-3, fasten off. (14 dc)

SMALL CROCHET FLOWER

Make 9.
Rnd 1: With Flower color, ch 4, sl st in first ch to form a ring, ch 1, 12 sc in ring, join in beg sc, fasten
off. (12 sc)

CROCHET FLOWER PURSE HANDLE

Make 2 each really green and light blue.
With green (blue), ch 200, fasten off.

TWISTED CORD

Make 2.
Holding 1 ch each color tog, fold in half and position fold over a stationary object or fold over a pencil and
have someone hold both ends. Holding all 4 ends of the chs tog, beg to twist, and continue to twist until
the cord folds in upon itself; remove pencil and allow twisted cord to form naturally.

CROCHET PURSE

Row 1: With really green, starting at bottom, ch 12, sc in 2nd ch from hook, sc in each rem ch across, turn. (11 sc)
Rows 2-24: Ch 1, sc in each sc across, turn. At the end of row 24, do
not turn.
Rnd 25: Now working in rnds, ch 1, [work 24 sc across long edge, work 11 sc across short edge] twice,
join in beg sc. (70 sc)
Rnd 26: Working in back lp  for this rnd only, ch 1, sc in each st around, do not join in beg sc, use st marker to mark rnds.
Rnd 27: Sc in each sc around, do not join, use st marker to mark beg of rnd.
Rnds 28-32: Rep rnd 27. At the end of rnd 32, si st in next st, fasten off.
Rnd 33: Working in back lps only, attach light blue, ch 1, sc in each st around, do not join in beg sc.
Rnds 34-52: Rep rnd 27. At the end of rnd 52, si st in next sc.
Rnd 53: Ch 3, (fpdc around next sc, bpdc around next sc) around, si st to join in 3rd ch of beg ch-3, fasten off.

CROCHET PURSE BOTTOM TRIM

Rnd 1: Working in rem front Ip of rnd 25 of Purse, attach really green, ch 1, sc in each st around, join in beg sc, fasten off. (70 sc)
Rnd 2: Working in rem front lp of rnd 32, attach really green, ch 1, sc in each st around, join in beg sc,
fasten off. (70 sc)

FINISHING

Sew Small Flowers evenly sp around over rnds 38-41 and Large Flowers evenly sp around over rnds
43-49. Sew a clear bead to the center of each Flower.
With a length of really green, embroider straight st stems and opposite end of Purse with other
end of same Handle. Attach 2nd Handle on opposite side of Purse in same manner.
-->

Thursday, February 28, 2013

Shabby chic & crafty crafts ideas

Shabby chic ideas

Crafty crafts jewellery frame

Shabby chic & crafty crafts ideas

I love my collections of earrings and bracelets, and like to have them on show. This shabby chic jewellery frame is a nice decorating idea which has pockets folded into the material that provide a pretty way to store - and display - each item.

Here, I have used vintage shabby chic floral fabric but any patterned material will work, as long as it's not too thick.

YOU WILL NEED
frame with a solid back that can either stand or be hung
fabric just over twice the length of. and 10cm wider than, your frame
ruler
scissors and pins
iron
sewing machine
double-sided sticky tape or fabric glue
needle and thread

Crafty crafts ideas:

Shabby chic & crafty crafts ideas
1 Cut your fabric to size, then turn over a narrow hem on all sides. Iron flat, pin in place and sew, removing the pins as you go.

2 For the pockets. lay the material out, right side facing up. Pleat, leaving sufficient distance between the top edge and the first pouch so it will fit inside your frame, and bearing in mind the size of the items you want to store - you could make some pouches deeper than others to hold bigger things. Use your ruler as a guide.

3 Iron the pockets flat and pin in place at the sides. Using running stitch, sew down each edge of the fabric to secure the folds, then go from top to bottom at intervals across your material, to form individual pouches.
Remove the pins as you go and press again.

Shabby chic & crafty crafts ideas
4 To display in your frame, attach a few strips of double-sided sticky tape to the solid back panel, peel off the backing paper, then place onto the wrong side of your fabric. Smooth the cloth down, ensuring it is
secured. Reposition until you are happy.

5 Fold the overhanging edges of material over the back of the frame, top and bottom first, then the sides, and hand-sew the corners together to create a neat finish.

6 Put the pocket panel into the frame and fix the back in place with the clips. 

Choose plainer fabrics if you're making this for a man - the design is ideal for cufflinks and watches.

Crafty crafts Cut-out pictures

Cut shapes from wallpaper, music scores or old maps, drawing designs on the reverse before snipping, and use plain or pretty paper for the background.

shabby chic ideas, crafty crafts


YOU WILL NEED
card or wallpaper
scissors and pencil
paper shapes
double-sided pads
box frame, with or without glass

Shabby chic ideas

1 Cut a piece of thick card or wallpaper to fit inside your frame. Arrange your cut-out paper shapes on top. leaving a sufficient border so your design fits within the frame.

shabby chic ideas, crafty crafts

2 Mark a small cross on the paper under the centre of each shape and place one or two double-sided sticky pads on top. Fold each shape to give it depth, then peel off the backing cover from the sticky pads and position your shapes on top.

shabby chic ideas, crafty crafts

3 Put your artwork inside the frame and secure the back with the clips provided. 

Enjoy these great shabby chic and crafty crafts ideas!

Wednesday, February 20, 2013

Crochet hat

Crochet hat pattern

Lady Sybil Cloche crochet hat pattern

Author: Brenda K. B. Anderson

crochet

Crochet hat. Getting Started

FINISHED CROCHET HAT SIZE 20 (21, 22)" head circumference; 9" from front of brim edge to top of hat; 8" from back of brim edge to top of hat.
YARN FOR CROCHET HAT Stitch Nation Bamboo Ewe (55% viscose from bamboo, 45% wool; 177 yd [162 mVm oz [100 g]; 4: #A5520 eucalyptus (MC), 1 skein. Aunt Lydia's Metallic Crochet Thread size 10 (88% cotton, 12% metallic; 100 yd 191 m]: 0 #0090G gold/gold, Vz skein (CC). Yarns distributed by Coats & Clark.
HOOK Sizes G/6 (4 mm), 8 (1.5 mm) steel hook. Adjust hook size if necessary to obtain correct gauge.
NOTIONS St markers (m); yarn needle; sewing pins; seven 6 mm beads; sewing needle and matching thread.
GAUGE 15 sts and 6 rows = 4" in linked tr with larger hook.

Notes for crochet hat pattern

Hat is worked from top down in joined rnds of linked sts worked bio. Applique is made separately and sewn to hat. Beg ch of each rnd is one ch shorter than standard and does not count as st. Shaping at bottom edge of hat is made using a variety of st heights.

When working rnd 13, using st markers is recommended to help keep track of st reps. Linked sts are worked by pulling up lps in horizontal bars on posts of taller sts.

STITCH GUIDE FOR CROCHET HAT PATTERN

Linked stitches:
Linked double crochet (Idc):
Foll a tcn: Insert hook in flo of 2nd ch from hook, yo and pull up lp, insert hook in bio of same st as join, yo and pull up lp, [yo, draw through 2 lps] 2 times.

Foll a Idc: Insert hook through horizontal bar in previous st, yo and pull up lp, insert hook in bio of next st, yo and pull up lp, [yo,draw through 2 lps] 2 times.
Foil a Itr: Insert hook through top 2 horizontal bars of previous st, yo and pull up lp, insert hook in bio of next st, yo and pull up lp, [yo, draw through 2 lps] 2 times.

Linked treble crochet (Itr):
Foll a tch: Insert hook in flo of 2nd ch from hook, yo and pull up lp, insert hook in flo of next ch, yo and pull up lp, insert hook in bio of same st as join, yo and pull up lp, [yo, draw through 2 lps] 3 times.

Foll a Idc: Insert hook through horizontal bar of previous st, yo and pull up lp, insert hook under front strand of Idc just below horizontal bar. yo and pull up lp. insert hook in bio of next st, yo and pull up lp, [yo, draw through 2 lps] 3 times.

Foll a Itr: Insert hook through top horizontal bar of previous st, yo and pull up lp, insert hook through next horizontal bar, yo and pull up lp, insert hook in bio of next st, yo and pull up lp, [yo, draw through 2 lps] 3 times.

Foil a Idtr: Insert hook through top 2 horizontal bars of previous st, yo and pull up lp, insert hook through next horizontal bar of same st, yo and pull up lp, insert hook in bio of" next st, yo and pull up lp, [yo, draw through 2 lps] 3 times.

Linked double treble (Idtr):
Foll a Itr: Insert hook through top horizontal bar of previous st, yo and pull up lp, insert hook through next horizontal bar in same st, yo and pull up lp, insert hook under front strand of st below lowest horizontal bar, yo and pull up lp, insert hook in bio of next st, yo and pull up lp, [yo, draw through 2 lps] 4 times.

Foll a Idtr: For the crochet hat pattern insert hook through top horizontal bar of previous st, yo and pull up lp, insert hook through next horizontal bar, yo and pull up lp, insert hook through lowest horizontal bar, yo and pull up lp, insert hook under bio of next st, yo and pull up lp, [yo, draw through 2 lps] 4 times.

crochet hat, crochet hat pattern, craft

Crochet Hat Pattern

HAT

With MC and larger hook, make an adjustable ring (see Glossary).
Rnd 1: 7 sc in ring, pull tail to tighten ring, sl st in first sc to join—7 sc.
Rnd 2: Ch 2, 2 Idc (see Stitch Guide) in each st around, sl st in first Idc to join—14 Idc.
Rnd 3: Ch 3, 2 Itr (see Stitch Guide) in each st around, sl st in first Itr to join—28 Itr.
Rnd 4: Ch 3, [2 Itr in next st, Itr in next st] 14 times, sl st in first Itr to join—42 itr.
Rnd 5: Ch 3, [2 Itr in next st, Itr in next 2 sts] 14 times, sl st in first Itr to join—56 Itr.
Rnd 6: Ch 3, [2 itr in next st, Itr in next 3 sts] 14 times, sl st in first Itr to join—70 Itr.
Rnd 7: Ch 3, [2 Itr in next st, Itr in next 34 (10,4) sts] 2 (6,12) times, Itr in next 0 (4,8) sts, sl st in first Itr to join—72 (76,82) Itr.
Rnds 8-12: Ch 3. Itr around—72 (76, 82) Itr.
Not*; Add or subtract rnds here to make hat shorter or longer, then cont with Rnd 13.

Rnd 13: Ch 2, [Idc in next 3 sts, 2 Idc in next st] 2 times, Idc in next 0 (0,1) st, [Itr in next 3 (3,4) sts, 2 Itr in next st] 2 times, Itr in next 0 (1,0) st, [Idtr (see Stitch Guide) in next 2 sts, 2 Idtr in next st, Idtr in next 1 (2, 2) sts, 2 Idtr in next 0 (1,1) st, Idtr in next 0 (1,1) sts] 5 (3, 3) times, Idtr in next 0 (0, 2) sts, [Idtr in next
st, 2 Idtr in next st, Idtr in next 2 sts, 2 Idtr in next 0 (1,1) sts, Idtr in next 0 (2,2) sts] 5 (3,3) times, Itr in next 0 (1, 0) sts, [2 itr in next st, Itr in next 3 (3,4) sts] 2 times, Idc in next 0 (0,1) sts, [2 Idc in next st, Idc in next 3 sts] 2 times, si st in first Idc to join—90 (96,102) sts.

Rnd 14: Ch 3, Idc in next 8 (8,9) sts, Itr in next 10 (11,12) sts, Idtr in next 54 (58, 60) sts, Itr in next 10 (11,12) sts, Idc in next 8 (8, 9) sts, si st in first Idc to join—90 (96,102) sts.
Rnd 15: Rev sc (see Glossary) in each st around. Fasten off.

Cut yarn leaving a long tail of the crochet hat. Sew holes closed along center back of crochet hat. Weave in ends.

CROCHET HAT APPLIQUE

Row 1: With CC and smaller hook, [ch 20, working in bio of ch, sc in 3rd ch from hook, sc in next st, hdc in next st, dc in next 2 sts, tr in next 4 sts, dc in next 2 sts, hdc in next st, si st in next 6 sts] 6 times—6 petals.
Row 2: Ch 1, sc in last sl st of each petal, Row 3: Ch 4, "yo 2 times, insert hook in next sc and pull up lp, [yo, draw through 2 lps on hook] 2 times; rep from" 6 times, yo 2 times, insert hook in previous sc and pull up lp, lyo, draw through 2 lps on hook] 2 times, yo and draw through all 8 lps on hook—One 7-tr duster.

STEM CROCHET HAT

Ch 36, working in back lp of ch, hdc in 3rd ch from hook, hdc in next 33 sts, sl st in top of tch to join. Fasten off, leaving a long tail.

FINISHING CROCHET HAT

Pin applique to crochet hat. With yarn needle and tail, sew applique" and stem to side of hat, referring to photo for placement. Sew beads to hat with needle and thread. Weave in ends. 

crochet hat, crochet hat pattern, craft

Saturday, February 16, 2013

Silk ribbon embroidery

Silk ribbon designs: An Aloe and a Spider

Step by Step Tutorial

Silk ribbon embroidery

For this silk ribbon embroidery design you will need:

#26 Cake-decorating wire
Spider earring from flea markets (or nose ring!)
Straw Needle no 3
Crewel Needle no 8
Sculpture or Doll's Needle

THREADS FOR SILK RIBBON DESIGN


Silk ribbon embroidery

STITCHES
Bullion Knots 
Needle weaving - Open Base Picot 
Needle Weaving - Closed Base Picot 
French Knots
Seeding
Back Stitch
Straight/Stab Stitch 

Silk ribbon embroidery step by step

STEMS
All 3 stems are raised off the fabric. Measure wire on silk ribbon embroidery design from base of leaves to base of flower. Add 1,5cm and cut. At base of leaves, take 1,5cm wire to back of work and secure with Stab Stitches. Wrap with a 70cm length of 2 strands Pine Needles thread. Secure the end of the wrapped wire with 2 Overcast Stitches on top of the orange aloe. There is no need to take the wire to the back of the work as the Bullion Knots hide the ends neatly.

silk ribbon embroidery


FLOWERS
For the flower silk ribbon embroidery design make light orange Bullion Knots first. Use 1 strand of Rayon and no 3 straw needle. Start at the base and make 4 to 6 Bullion Knots to form the first layer. The silk ribbon knots vary in length. Then proceed to the next layer overlapping the first few Bullion Knots in places. Proceed up the length of the Aloe, changing to the Flame Lily thread as shown in the watercolour. At the top you will need fewer and fewer Bullion Knots until only 1 or 2 are needed to form a sharp point.

silk ribbon designs, craft,


WORKING WITH RAYON SILK RIBBON EMBROIDERY THREAD

Many people don't like working with Rayon thread, yet it is the nature of the silk ribbon  thread that makes for such perfect Bullions. The thread slips off the needle easily and springs back into shape when the Bullion is formed.

Silk ribbon embroidery hints

1. Before threading the Rayon silk ribbon embroidery, it is a good idea to run the thread across a damp (not
wet) sponge to straighten it.
2. Use short lengths of thread - about 25cm.
3. End off and start with a fresh thread as soon as the Rayon becomes fluffy.
4. Always use a straw needle to form Bullions. The needle is not tapered, so it can slip through the wraps without getting stuck.

silk ribbon embroidery


Silk ribbon embroidery: LEAVES

Use 1 strand of the Apple Green Perle thread and the same straw needle to make the leaves. Start with the most underneath leaf first and make an Open Basese Picot. I use the shorter sot! sculpture needle, also called a doll's needle (± 9cm in length) to work with. Pack the stitches tightly next to each other and keep an even tension.
For some of the leaves I used a Closed Base Picot. made with the same Svead for a sharper base.
Secure some of the leaves at the top with a tiny stitch while allowing others to stand free.

silk ribbon embroidery


Silk ribbon embroidery hints
* As you weave each stitch, push the previous stitches up towards the tip with your needle.
* Allow the leaves to hang loose until all leaves are completed. Move some leaves out of the way, where necessary, to fit the next leaf.

silk ribbon embroidery, silk ribbon designs, craft


Silk ribbon embroidery designs: GROUND

Thread a no 8 crewel needle with 2 strands Rustic Brick Stranded Cotton and make French Knots (2 or 3 wraps) at the base of the plant to balance the picture. Along the outer edges I used 2 strands of the same
thread and Seeding to add more detail to the picture.

silk ribbon embroidery, silk ribbon designs, craft

Silk ribbon embroidery designs: SPIDER'S WEB

Make the silk ribbon spider's web design: Refer to the completed spider web to help you.
Use 1 (or 2 if you like) strands of silver metallic thread and the straw needle. Make the spokes with long Straight/Stab Stitches first, remembering to anchor them onto the stem, leaves and sides of the panel for a more authentic appearance. Complete the silk ribbon web design with Back Stitch working from the centre outwards. Insert the spider earring through the fabric. Bend the stalk to flatten against the fabric and secure in place with tiny stitches.

silk ribbon embroidery, silk ribbon designs, craft


Hint:. If the stalk breaks off, don't worry; simply stitch spider onto web with tiny stitches using the metallic thread.

From Ribbon Embroidery and Stumpwork by Di van Niekerk

-->

Related Posts Plugin for WordPress, Blogger...
Twitter Delicious Facebook Digg Stumbleupon Favorites More

 
Design by Free WordPress Themes | Bloggerized by Lasantha - Premium Blogger Themes | Premium Wordpress Themes